To say the iPhone has come a long way since my first iPhone 4 in 2010, is a colossal understatement!
Today's iPhone cameras produce a 12mp image (or more when we shoot RAW or create panoramas), can make long exposures without a tripod or neutral density filter, and can achieve a shallow depth of field with the Portrait mode.
Additionally, computational photography has come a long way in helping us get noise-free night and other low-light photos, and balanced exposures with built in Smart HDR (high dynamic range) features.
And, then, there’s the ability to create RAW with select apps, or Apple’s proprietary ProRAW with the native camera in the iPhone 12 Pro and 12 Pro Max, and the 13 series iPhones, which gives us more data to work with and increases our creative control when editing our images.
All these advances enable us to produce extremely high-quality photographs. They are so good, in fact, that, as I photograph with the iPhone, Fuji, Lumix, and Nikon cameras, I often have to look at an image’s metadata to determine which camera made which photo. I can no longer always tell just by looking at the image alone.
Yet, with all these advances, I still see images that are needlessly of lesser quality than our iPhones are capable of producing.
Case in point, I recently had the pleasure of judging a mobile photography competition. The composition of the images was tremendous as was the creativity and impact of the photos entered, but many images, when I enlarged them to get a better look, appeared noisy and grainy. It was evident that the quality of these images was compromised by a common mistake that many mobile photographers are unaware of making.
It’s very easy to make this one little mistake that has some very big consequences on the quality of our photos.
It has to do with how we zoom with our iPhone.
To understand the concept of zoom, it helps to take a closer look at the iPhone cameras and lenses built into today's iPhones.
Most iPhones today have three lenses:
- an ultra wide angle 13mm, labeled 0.5x on the native camera interface,
- a wide angle 26mm, labeled 1x on the camera interface, and
- a telephoto which is either 52mm, 58mm, 65mm, or 77mm depending on your iPhone model. These are labeled either 2x, 2.5x, or 3x on the camera interface.
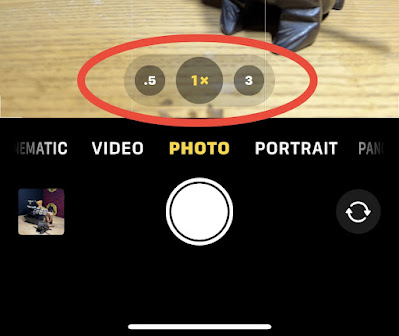 |
| Native Camera on 13 Pro Max with 1x selected. |
As long as we select one of these lenses to get closer to our subject, we are staying in the superior quality zoom known as optical zoom. That is, we are using the actual optics in the camera’s lens, the physical properties of the lens itself, to magnify a distant subject, making it appear closer. Using the physical properties of a telescope to view a distant ship at sea is an example of optical zoom. The ship looks closer and there is no loss of quality in what we see.
The topic of optical zoom can get very technical very quickly, but the gist is this: when we select one of our iPhone’s cameras/lenses by tapping on 0.5x, 1x or 2x, (or 2.5x, or 3x depending on the model), we are telling the camera to use the actual physical lens to magnify the subject and make it appear closer with little loss of quality.
Optical zoom is what we want to use if we’re looking for the highest quality in our images.
If you are intending to print the image, especially if you want to enlarge it for a print, images created with optical zoom will provide the best results.
The lesser quality zoom is digital zoom.
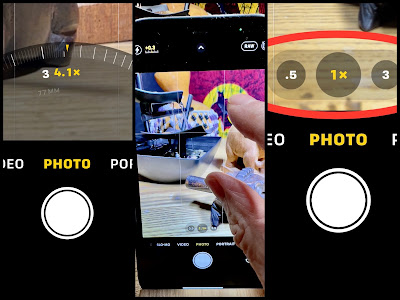
Anytime we use a two-finger pinch or spread gesture, or use the Zoom Dial in the camera interface, we are forcing the camera to switch from the superior optical zoom to the inferior digital zoom, unless we ensure that we land on one of the optical options (.5x, 1x, or 2x, 2.5x, or 3x). If you stop anywhere else on the dial, you'll be getting a lesser quality digitally zoomed image.
 |
| Using a two-finger gesture to zoom degrades your image. |
Rather than using the physical properties of the lens itself, digital zoom engages software to help enlarge the image. The result is very similar to what happens when we enlarge an image after cropping.
There is no additional data in the image file, so the software essentially “stretches” the image which results in noisy, grainy images with enlarged pixels.
If the sole destination for your images is social media and posting online, you may not notice much degradation in the image quality of a digitally zoomed image. Most images look good online. But as soon as you go to print or enlarge the digitally zoomed image, even the smallest amount, you’ll quickly see the photo’s quality limitations.
Smart phone makers don’t make clear the consequences of this switch from optical to digital zoom. In fact, they use how much their camera can zoom as a selling point. And they make digital zoom really easy to do with a two-finger gesture to “zoom in” or the Zoom Dial that appears when you long-press on one of the optical designations (1x, 2x, etc.) in the camera interface.
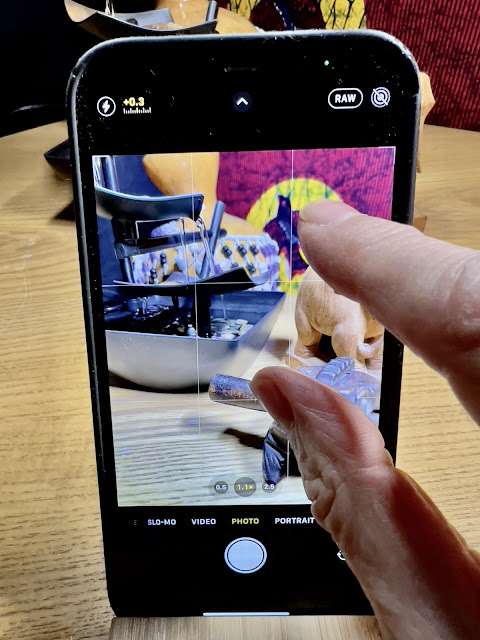
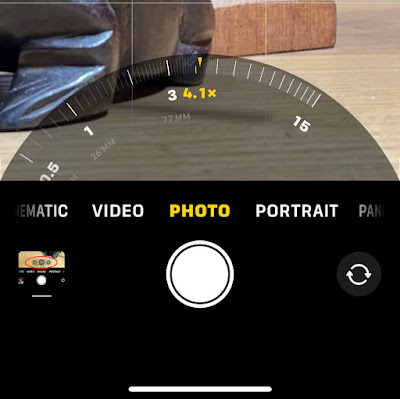 |
| Using the Zoom Dial degrades your Image |
On the iPhone 13 Pro Max, you can digitally zoom up to 15x, but when you do, the quality of your image suffers. Manufacturers do a great job of selling the ability to “zoom in,” but they don’t always share the fact that doing so can significantly degrade your image.
So, what’s the best way to zoom with your iPhone?
Here are some tips:
- Zoom with your feet. If you can, walk closer to your subject.
- Select one of the camera/lens options on your native camera interface (0.5x, 1x, or 3x). Choosing one of these will ensure that you will be using the physical lens in the camera to magnify the subject and make it appear closer with little compromise in quality.
- Avoid using the two finger pinch/spread gesture to zoom as doing so will lead to a digitally enlarged image of lesser quality.
- Avoid using the Zoom Dial unless you zoom to one of the three optical designations of 0.5x, 1x, or your iPhone's telephoto lens, 2x, 2.5x, or 3x. If you use the zoom dial to land anywhere except one of your iPhone's optical designations, know that you'll be degrading your image. If you see Sasquatch riding a unicorn under a rainbow on the distant horizon by all means, zoom to 15mm to remember the moment! But do it with the knowledge that the image will be of lesser quality and probably not have sufficient resolution to print with integrity.
- If getting close is important and you can’t zoom with your feet, and the telephoto lens on your iPhone is not getting you close enough, you may want to consider a 58mm or 60mm accessory lens. My favorites are lenses from Moment and ShiftCam. Each system requires that you use their case to attach the lens to the camera. While both these companies make a great product, I prefer the ShiftCam lenses because not only are they great quality glass, they are threaded so that they attach securely to the case.
- As a last resort, Gigapixel AI to the rescue! This desktop software from Topaz Labs can save the day. If you have an image you want to print, but which has been created with digital zoom, consider using Gigapixel AI to enlarge it before printing.
(Use my Link (https://www.topazlabs.com/gigapixel-ai/ref/8/) and Code (RAD15) for a 15% discount.)
The sole purpose of Gigapixel AI is to enlarge smaller, lower resolution images with integrity and it does a marvelous job. You can enlarge a cropped, zoomed, or otherwise lower quality image by as much as six times (6x) and the result is an image with higher resolution that will often look far better than the image at its original size.
Thanks for reading! I hope you find this helpful as you create images with your iPhone.
Please, click the links below to ...
- Subscribe to my monthly Newsletter for other tips and tricks on iPhone photography desktop processing, Topaz tools, and How I Did It!™ video tutorials.
- Visit my YouTube Channel for free videos on a variety of photo topics.
- See my list of How I Did It!™ Video Tutorials on a variety of topics from iPhone to desktop processing with Topaz tools.