This blog post is for my friend Donna Ulrich who asked to
see a before and after of this image of the prairie at McCloud Nature Park in
Hendricks County, Indiana.
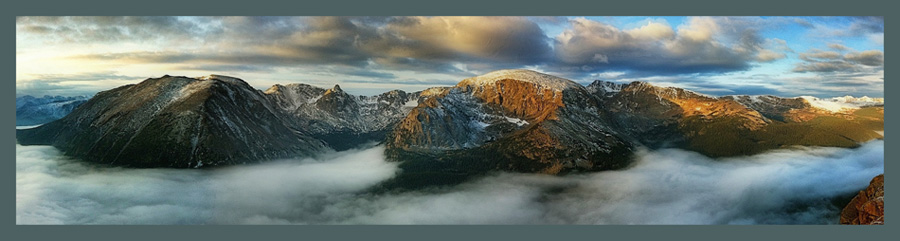
This is the “straight,” unadulterated shot, taken with 645 Pro.
 |
| "Straight" shot from 645 Pro |
I
like this camera app because it saves in TIFF and creates a larger file, which
is important if you intend to print very large. This file is 10,619,712 total
pixels. (TIP: Use the great free utility app, PhotoSize by Danny Goodman, to
check the size of images.)
Next I took it through SnapSeed and applied Ambiance and
Contrast from the Tune Menu and Sharpen and Structure from the Details Menu.
Those adjustments left the image looking like this:
 |
| After SnapSeed Adjustments |
You can see that the SnapSeed adjustments have added some contrast, clarity, and a little saturation. There's a tad more detail in the sky, too.
I wanted to create a somewhat surreal, moody image, so next I took
it into Distressed FX and tried several texture overlays before settling on
this one, leaving the image looking like this:
 |
| After Distressed FX |
The texture still wasn't all I was looking for, so I took the SnapSeed result (above) into Mextures. This is an incredibly powerful and rich app with lots of textures and control in using them. For this image, I wanted some grit in the sky, so I played with several options until I landed on this result:
 |
| After Mextures |
This result, by itself, is not at all what I was looking for, but I knew if I blended it with the Distressed FX version, I'd get that grit I was looking for, as well as some of the richer tone from the bronze color. I used Image Blender in the Normal blend mode and achieved this result:
 |
| Blend of Distress FX and Mexture Versions |
If you are fortunate enough to have Blur FX from a previous
purchase, I recommend using it. (See my blog post, Creating Your Own Orton Effect for details).
Unfortunately, Blur FX is no longer available. As a substitute, you can use Tilt Shift Generator which is still available and works almost as well.
Unfortunately, Blur FX is no longer available. As a substitute, you can use Tilt Shift Generator which is still available and works almost as well.
You’ll want to use one of these apps (Blur FX or Tilt Shift Generator) to create a blur of the blend of the Mextures and Distressed FX images. Your blurred image should look something like this:
Once you have the blurred image, blend it with the unblurred version using
the app Image Blender. Blender allows you to control just how much softness you
keep in your final image.
 |
| Blurred in Blur FX or Tilt Shift Generator |
Here’s how this one ended up:
 |
| Final Result |
I hope you found this tutorial useful, and Donna, thanks for asking to see a before and after. Got me to create this tutorial!
For those of you in the Indianapolis area, I'll be teaching an iPhoneography Workshop this Saturday, November 1, in Zionsville. Here's a link to more info and registration.
Whatever you do, keep on shooting!


